A few months ago, I posted an article explaining how to set up pfSense on your home network to improve its privacy and security. As time passed, I found some ways to improve this configuration to make my network more reliable and lower the configuration burden when adding new machines. This is what I will present in this article.
Easier firewall and switching between VPN/non-VPN network#
In my initial configuration, I was assigning clients to the 192.168.1.0/24 subnet, routed all the
Internet traffic through my VPN connection by default, and added firewall rules for each machine
that I wanted to use without the VPN.
This configuration had multiple issues. First, configuring a new machine to not use the VPN required configuration changes in at least three places. Then, there was no easy way to temporarily disable the VPN for a machine.
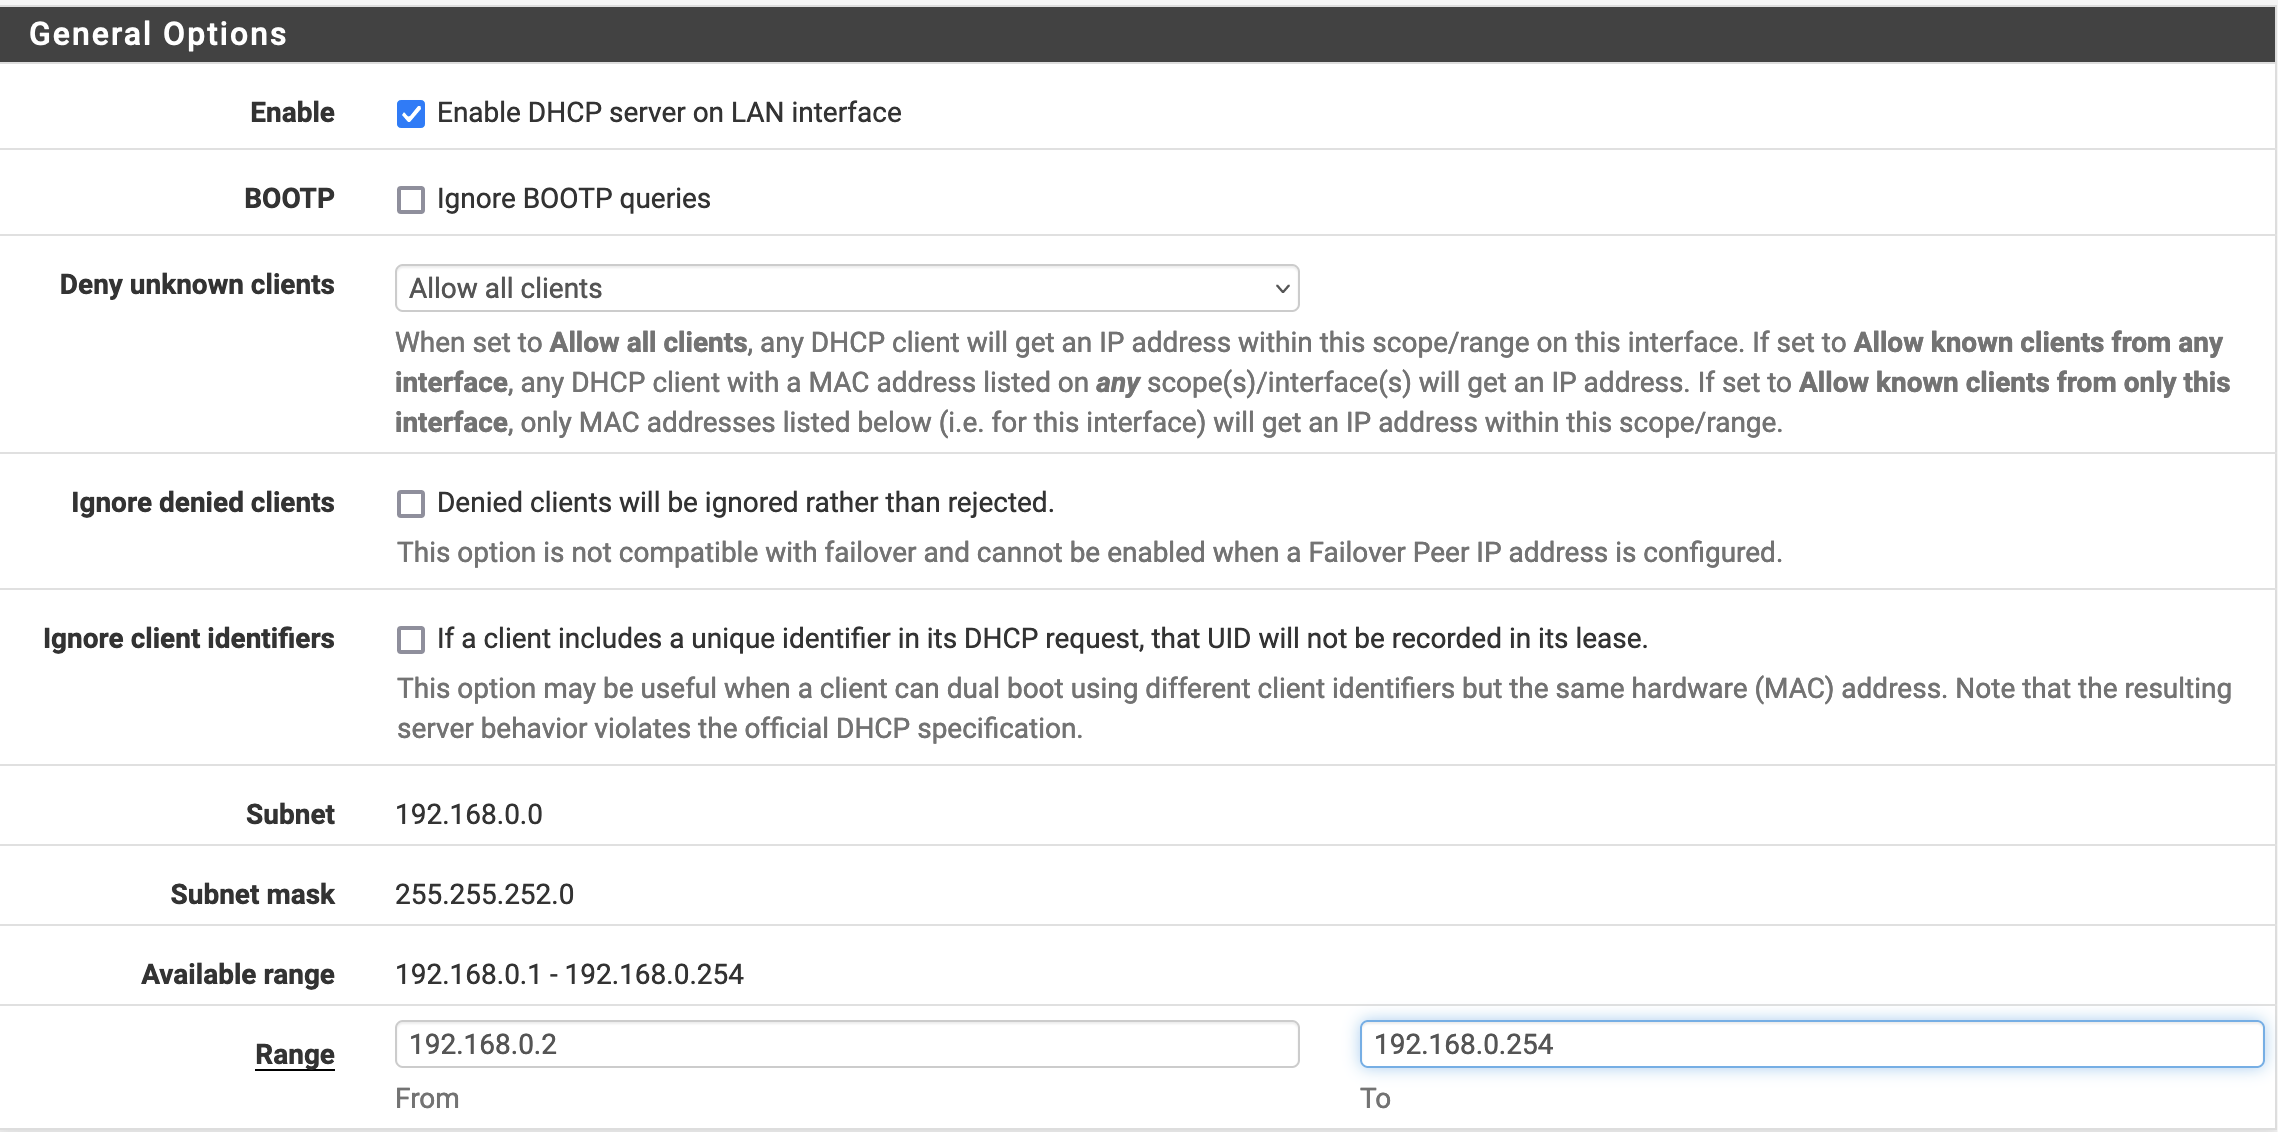
In my new configuration, I’m using the 192.168.0.0/22 subnet and assigning the IPs as follows:
192.168.0.2->192.168.0.254are assigned with DHCP, and using the VPN + pfBlockerNG192.168.1.2->192.168.1.254are manually assigned and are using the VPN + pfBlockerNG192.168.2.2->192.168.2.254are manually assigned and are not using the VPN but are using pfBlockerNG192.168.3.2->192.168.3.254are manually assigned and neither using the VPN nor pfBlockerNG (but are still using the local DNS)
When I add a new machine to my network, I make it so that the last byte of its IP address is unique
so that switching subnets is more convenient (less risk of switching to an already used IP.) For
example, if I have three machines, I will assign them the IPs 192.168.1.2, 192.168.3.3, and
192.168.1.4. If at some point I want to use the first machine without any VPN, I can simply change
its WiFi configuration to use the IP 192.168.2.2 in the network settings, and I know that this IP
will not be in use by another machine.
Now, let’s configure all this. The first step is to go to the LAN interface and change its static IP configuration.

Then, we make sure that our DHCP server is correctly configured in Services/DHCP Server/LAN
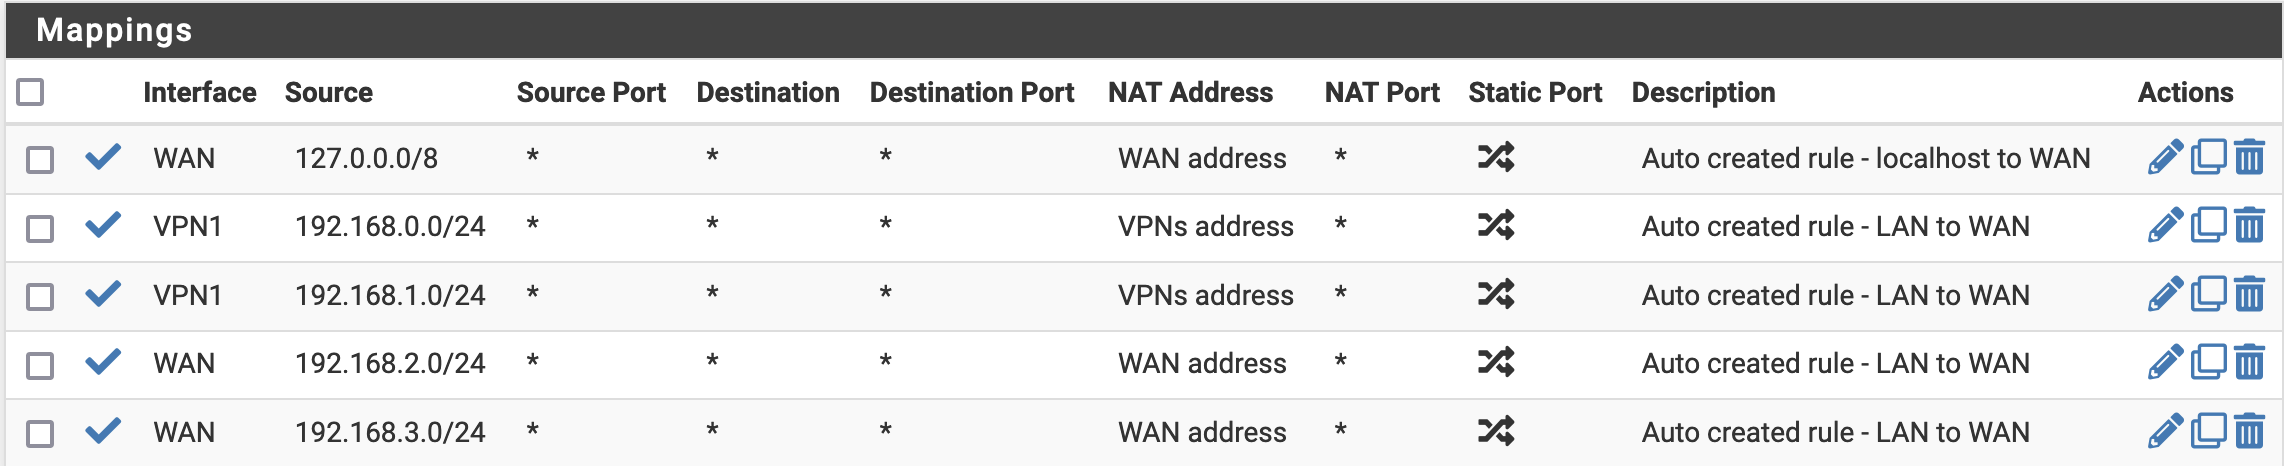
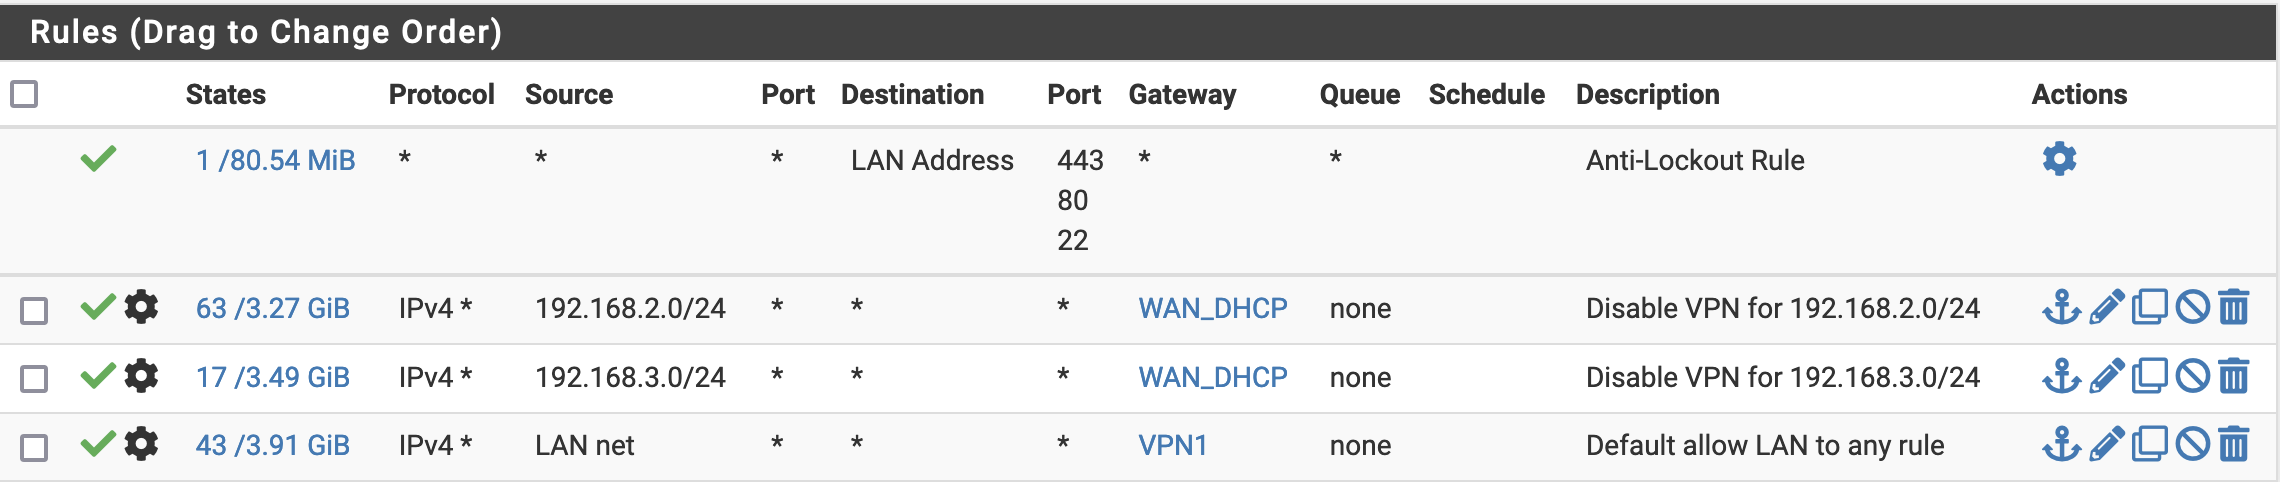
Next the Outbound NAT and LAN firewall rules
Finally, we want to disable pfBlockerNG for 192.168.3/24. Let’s go to
Firewall/pfBlockerNG/DNSBL/Python Group Policy and write each address in the Bypass IPs. Sadly,
there is seemingly no way to give a range, but we can get all the addresses within it with the
following bash script (that we execute on our machine before pasting the output into the UI.)
for value in {0..254}
do
echo "192.168.3.$value"
done
Now that all is configured, we don’t have to make complicated changes each time we add a machine to
our network. We can just go to the DHCP Static Mappings for the LAN interface, and assign an IP in
the appropriate range to our new machine.
In my case, since my WiFi router can use both a 2.4 GHz and a 5 GHz network and the same time, I have my computer automatically connect to the first one using DHCP (with an IP attributed to use the VPN) and the second one has the auto connect disabled and manually configured the IP address I want on my computer.
Better reliability for users not interested in privacy#
If you have people in your house who are not interested in privacy, they will probably (loudly) complain if they encounter issues. This could be some VPN connection error, blacklisted IP, or ad-blocker false positive.
What I do in this case is add a DHCP mapping for their machines in the 192.168.3.0/24 network so
that they are not using the VPN and adblocker. I will also configure a second and third DNS server
in the DHCP configuration (here Cloudflare’s ones.)

The reason for the VPN mapping is that in the previous article, we configured the resolver so that it will use the VPN connection to do DNS queries. This means that if the VPN is down, the DNS will be too. Adding extra DNS servers allows making sure that machines connected to the network won’t be affected by pfSense’s DNS not working.
Backup VPN in case of outrage#
With the previous configuration, we improved the network reliability for machines not using the VPN, but what about the other ones? To help with that, we will configure pfSense to have a second VPN connection to another VPN server, and route the relevant traffic through it if the first VPN connection fails.
First, we go to VPN/OpenVPN/Clients, create a new one and check that it runs fine in
Status/OpenVPN.
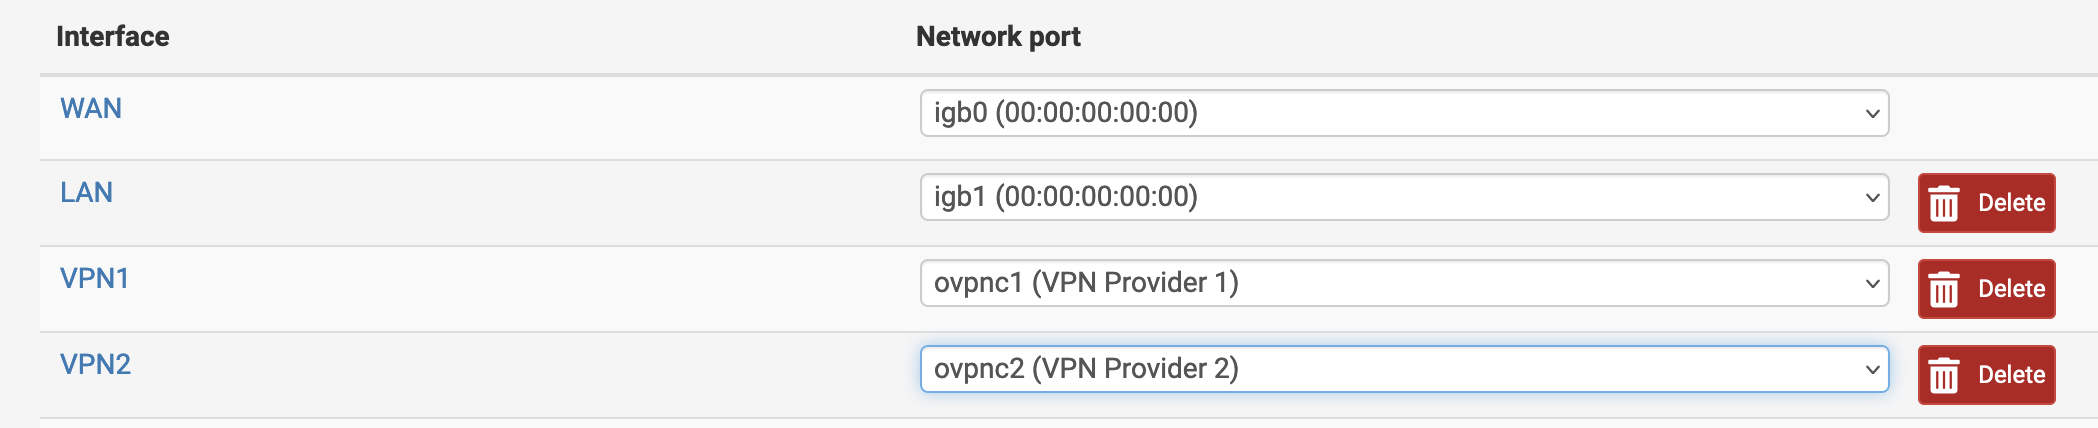
Then, we go to Interfaces/Interface Assignments and assign a new interface to the VPN client we
just created.
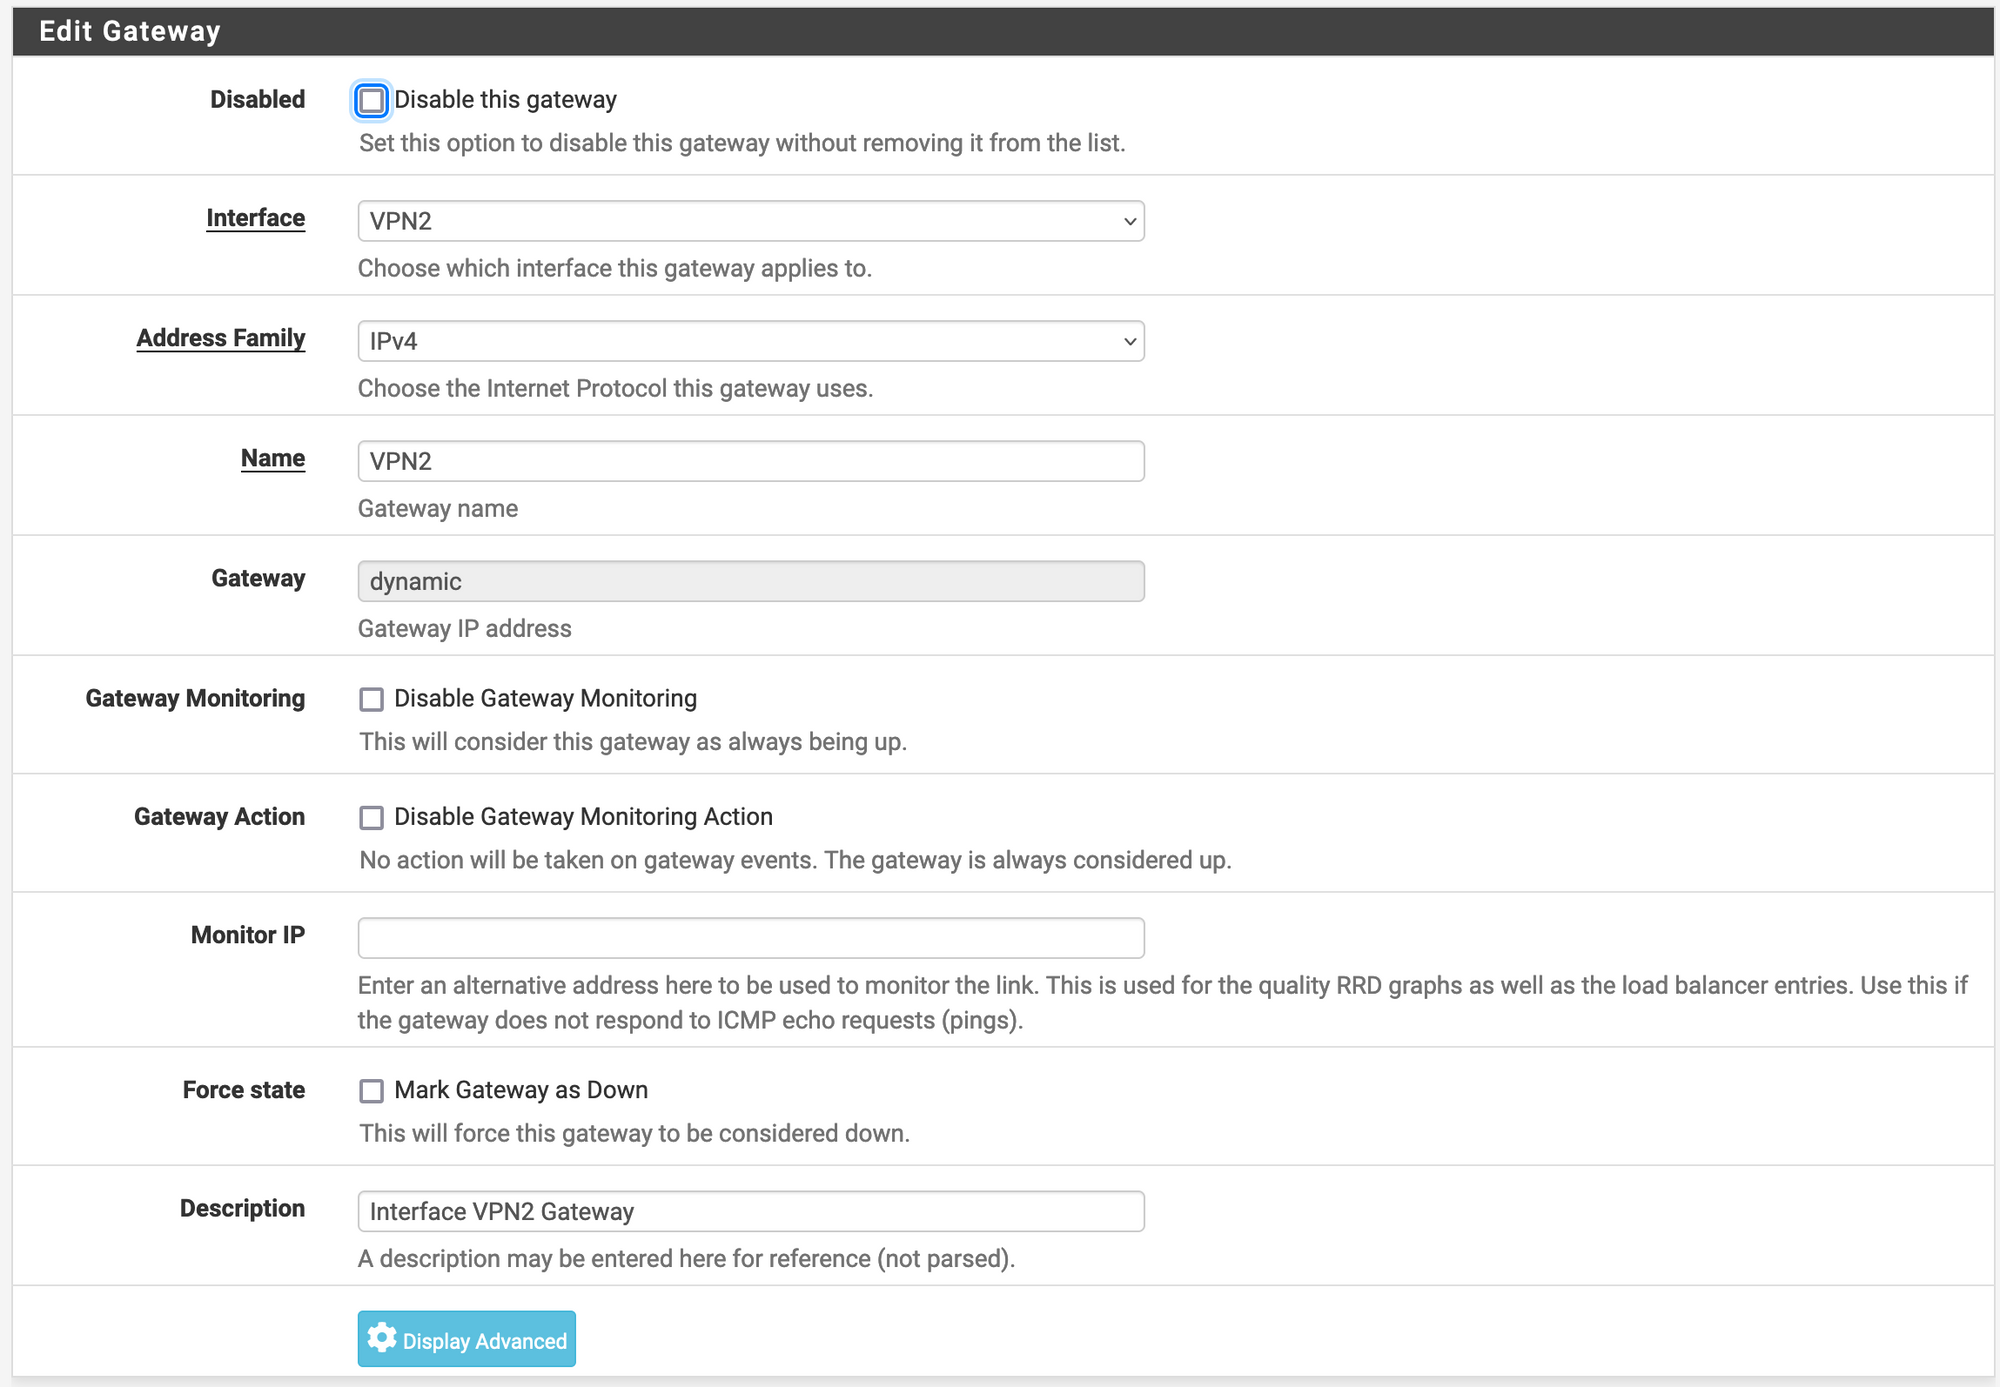
After that, we go to System/Routing/Gateways and make sure that we have a gateway with the
following configuration, and create a new one if it doesn’t exist.
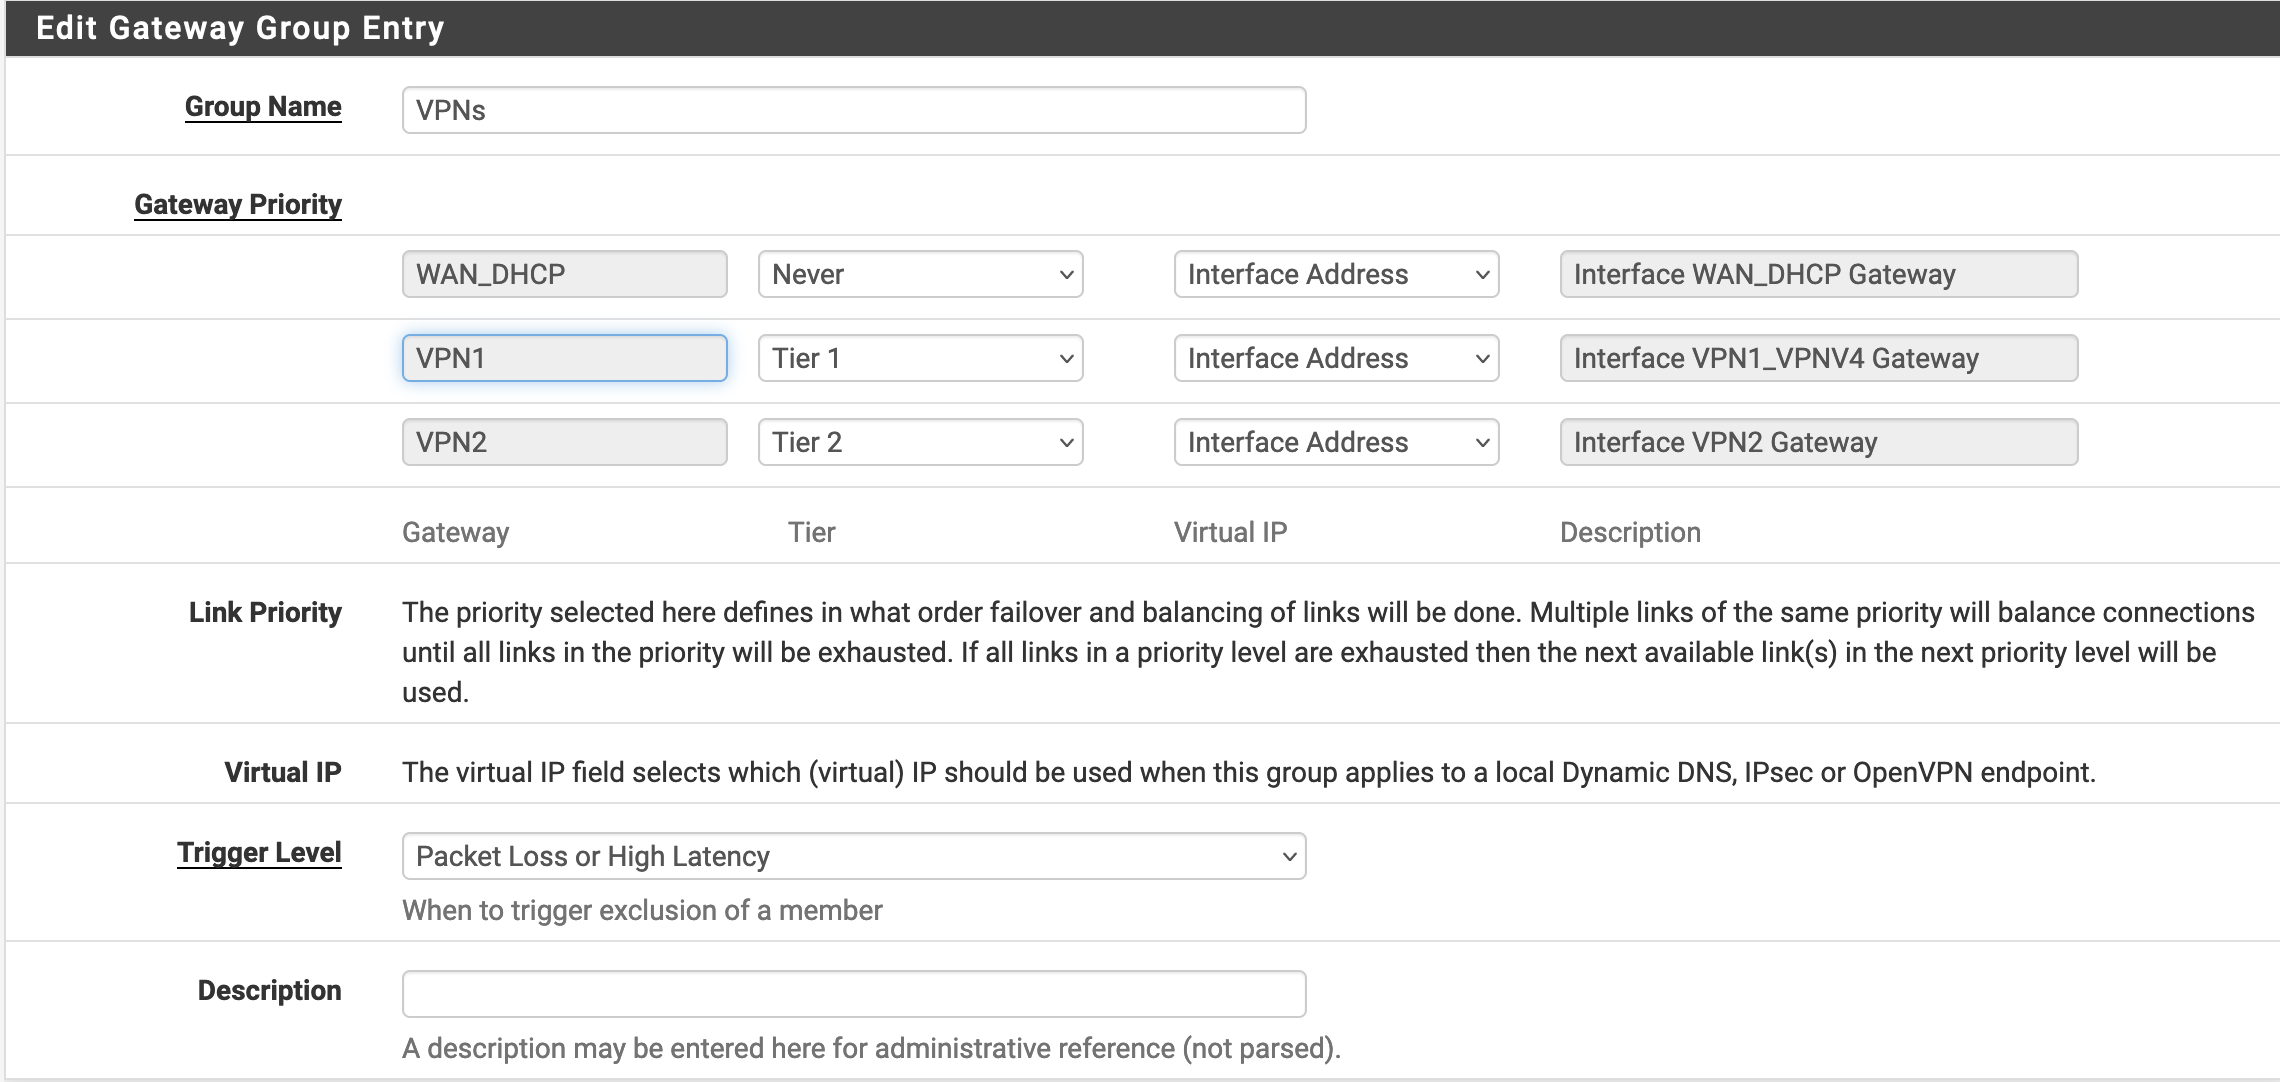
Then, in System/Routing/Gateway Groups we create a new gateway group and assign a tier to each VPN
connection. In my case, I want to always use VPN1 except when it is not working properly, then I
want to switch to VPN2. Putting the same tier also works, but it means that the two VPNs will be
used in parallel.
Finally, we need to go to Firewall/Rules/LAN and Firewall/NAT/Outbound and change the rules
using VPN1 to make them use VPNs.
At this point, all the networking works, but since we are also using a local DNS resolver, we also
want to go to Services/DNS Resolver and change the Outgoing Network Interfaces to have both
VPN1 and VPN2 selected (sadly, there is currently no possibility to use our VPNs gateway group
at the moment.)
Conclusion#
If you went through all the steps in this article, your home network is now more reliable, and you shouldn’t suffer any more inconvenience when the VPN connection goes down, or when you want to define which machine should or shouldn’t use the VPN connection.
If you found this article useful, you might also appreciate my recent How To Protect Your Self-Hosted Services With WireGuard article where I explain how to configure a pfSense machine to route traffic to a specific IP range through a WireGuard VPN connection.
Credits#
- Cover image by Compare Fibre on Unsplash