Nowadays, everyone is carrying a smartphone and using it to take photos and share them, which can sometimes result in unwillingly sharing a sensitive location (e.g. your home address). We are also at the age of false information on social media, where a lot of people share (willingly or not) fake images to support their views or help their agenda.
In this article, we will speak about countermeasures against these unpleasant, things, and how you can use them to your advantage to acquire information. We will first go through images metadata, then mention a couple of techniques to determine if an image was photoshopped, and finally list a few methods that you can use to find the origin of a picture and the location where it was taken.
EXIF and metadata#
Maybe you ever heard about EXIF; it stands for Exchangeable Image File Format and is a standard that defines how metadata related to an image is handled.
EXIF can store a lot of data on your pictures, such as:
- The camera (or smartphone) model used to take the picture, as well as the version of the operating system running on it
- The date and time when the picture was taken and modified
- Various technical information such as the exposure, the focal, the ISO, the resolution, if the flash was used, etc
- The GPS latitude, longitude, altitude of where you took the photo, as well as the speed you were going at
This information can be viewed using various software, such as FotoForensics (that also displays more useful information - note that it will store your image online and make it accessible through a permanent URL), or locally on your computer (Ghiro is a good open-source option that can run locally). Such information may be useful for some professional photographers, but for most people, it will just unnecessarily give away a lot of personal information. Do you want to share your phone model, and the location of a picture (e.g., your home) when you share it on the Internet? I don’t think so. The NSA loves it though. They reportedly planned to add EXIF tracking capabilities to its XKeyscore system in 2008.
Luckily, there are things you can do to protect yourself. First off, Android and iOS allow you to not include the GPS location in the photos you are taking. Unfortunately, it doesn’t seem that you can prevent the other information to be included when taking a picture, but all the models and computer operating systems have built-in functions to remove this data, or to share pictures without it. For most people, GPS location removal would however probably be enough, as it is the most sensitive information.
Note that multiple other metadata can be attached to a picture. For example, XMP (Extensible Metadata Platform), which is an ISO standard created by Adobe “for the creation, processing, and interchange of standardized and custom metadata for digital documents and data sets”. XMP also contains useful information (if you are doing OSINT) such as some history of the operations carried on the images and the Software agent used, and on what platform.
Was this Image Altered?#
Now that we went through the basics, let’s dive a bit deeper and talk about the various thing we can do to determine if a picture is likely to have been altered or not. A great software you can use for that is 29a.ch, which provides many useful tools. In this part, we will introduce three of them and see how it is possible to take advantage of them to analyze images. If you are curious about more types of analysis (many of which are very useful as well, such as clone detection) you can have a look at the references at the end of this article.
ELA - Error Level Analysis#
This method can work with formats using lossy compression like JPEG. This kind of compression uses inexact approximations and discards some parts of the data in order to reduce the file size. Lossless compressed images (such as PNGs) pixels on the contrary will remain the same even after being compressed.
ELA allows showing the different levels of compressions within an image. In a normal situation, the different elements shown in the picture should be similar, but if the image was changed, some discrepancies may be found. To analyze a picture, one should look at the following elements:
- The flat surfaces should be the same, regardless of the color
- Similar edges should have similar brightness
- Textures looking similar in the original image should do the same with the ELA filter
Text explanations are good, but in this case, a visual example would be easier to understand. Let’s look at the following one.
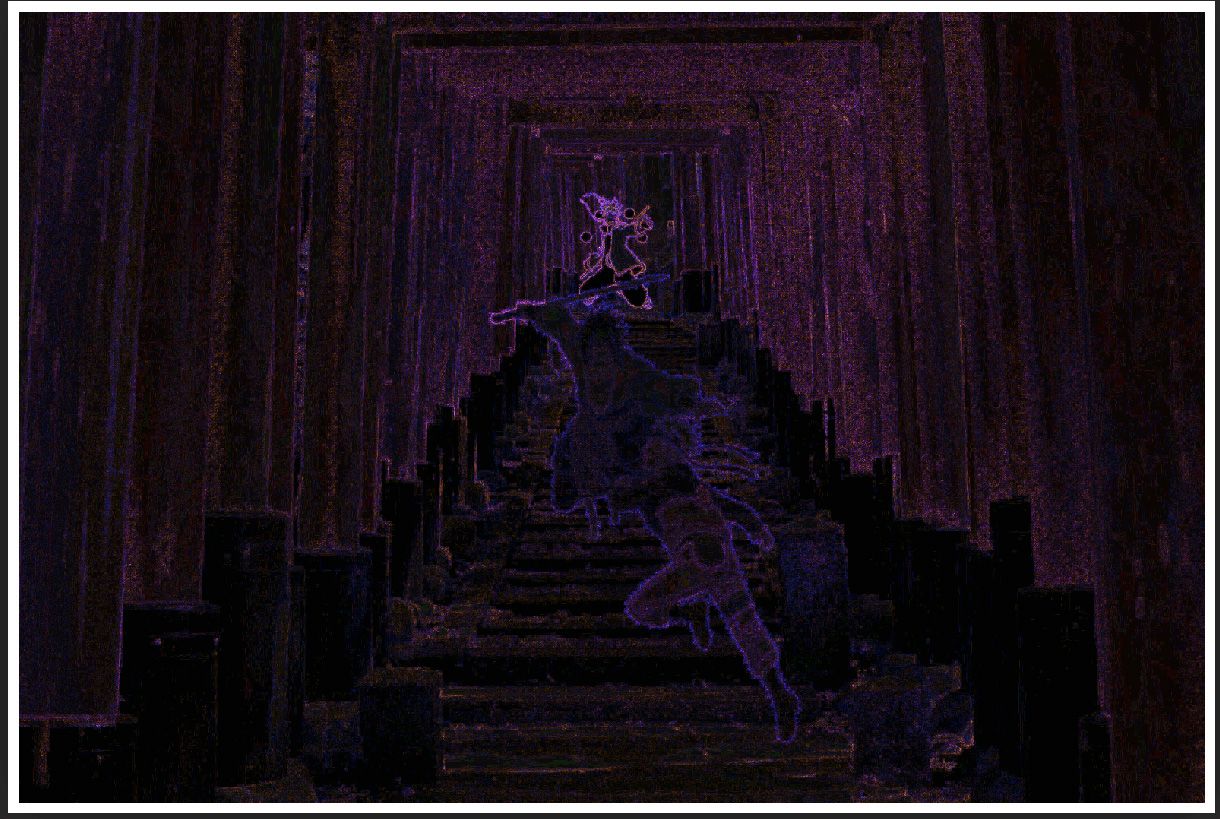
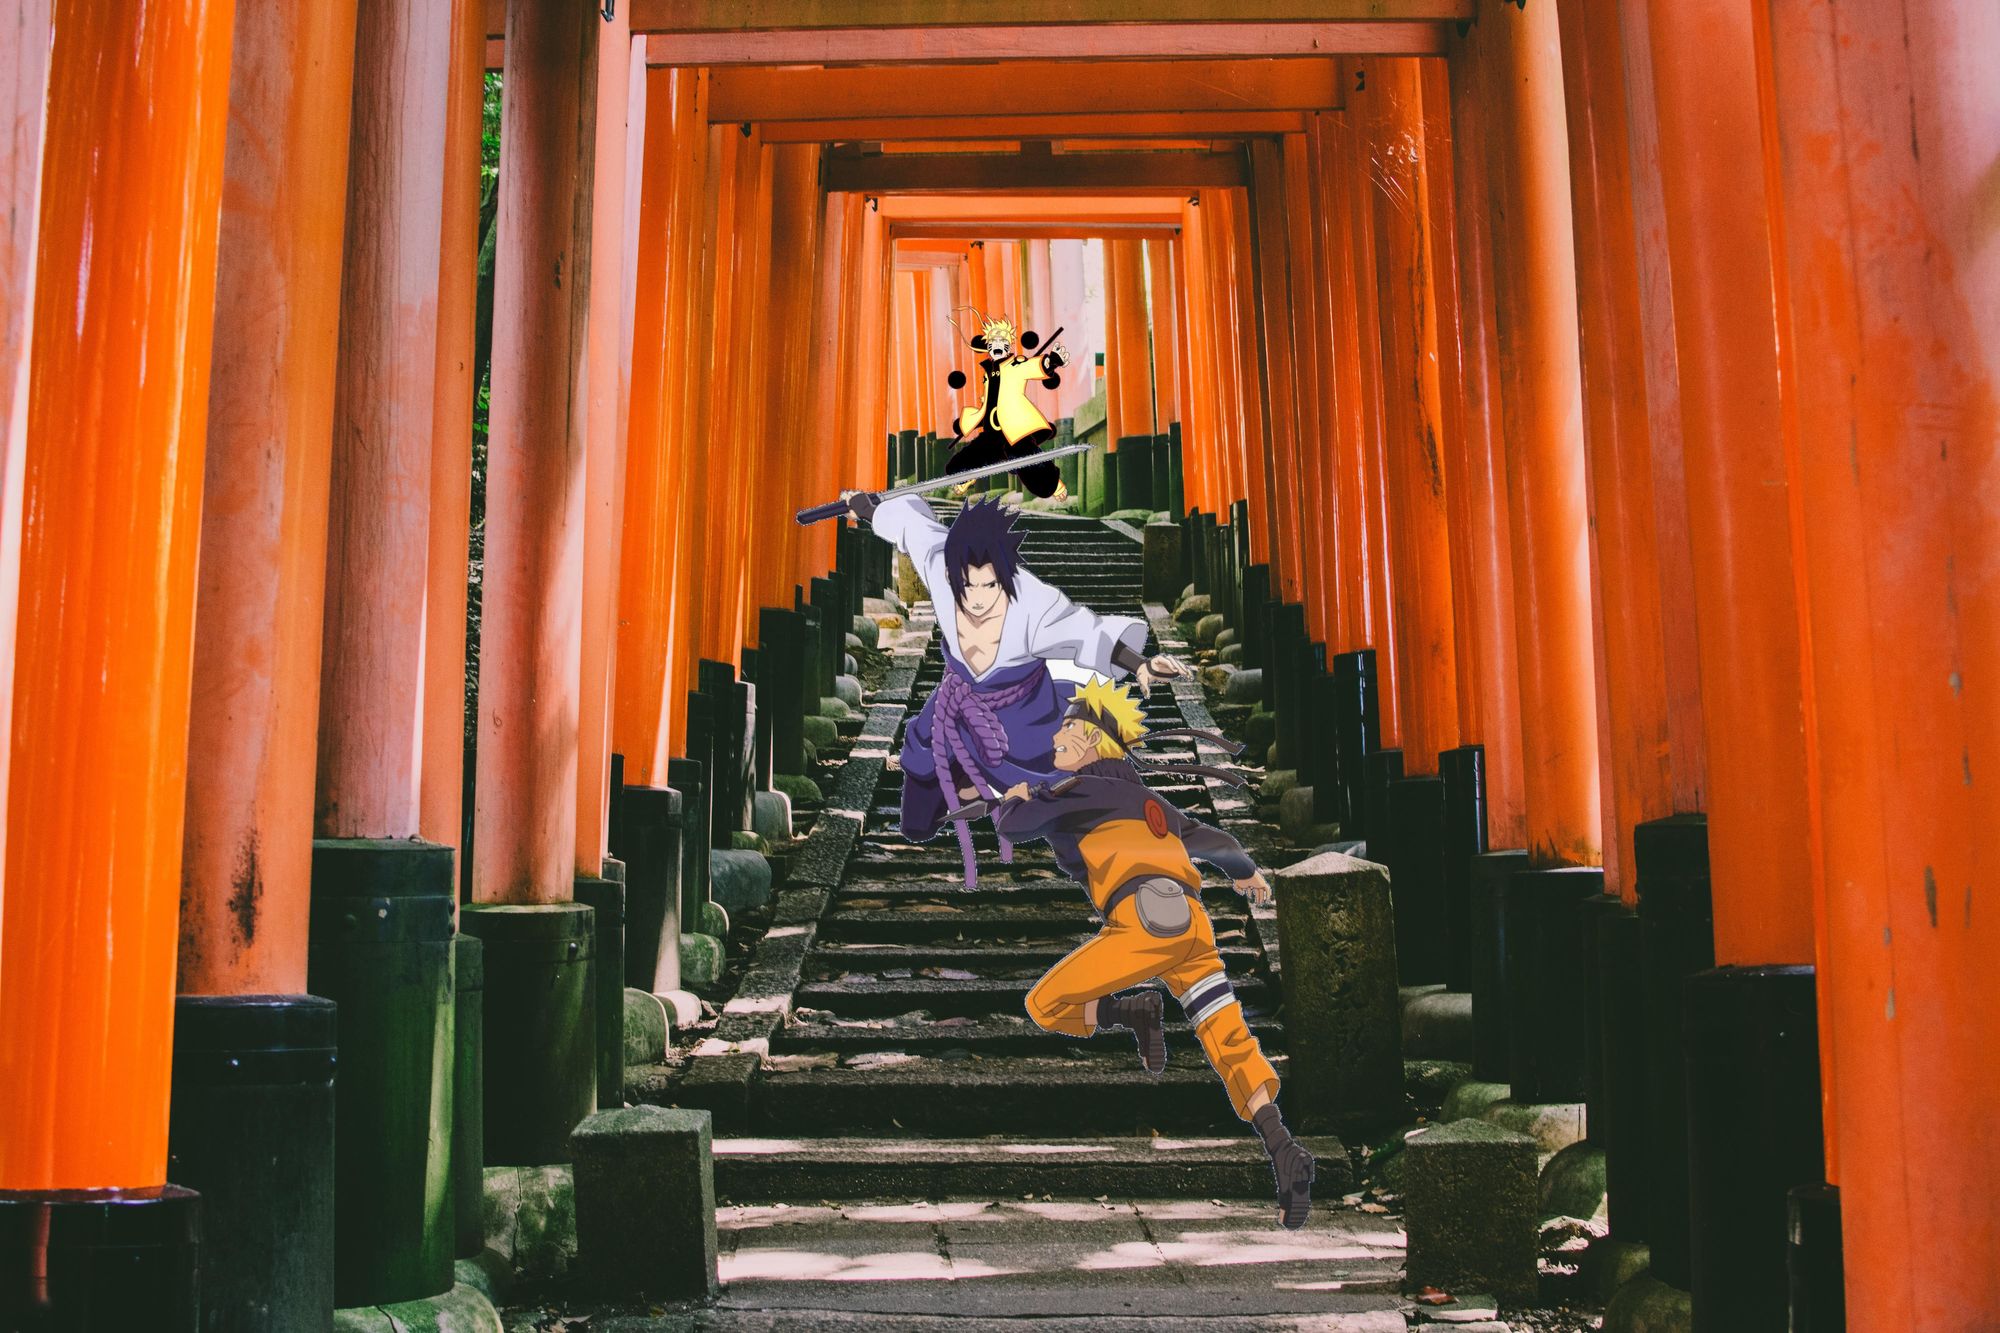
The left image is the result of the ELA filter, and the right one is the original. The image was created by pasting two images into a background: the character in the back, and the two characters fighting in the front.
When looking at the ELA analysis image, and considering the previous explanations, it is pretty easy to see that the image was edited. While the borders of the orange structures in the original picture are all similar under the ELA, the contour of the three characters have a widely different brightness.
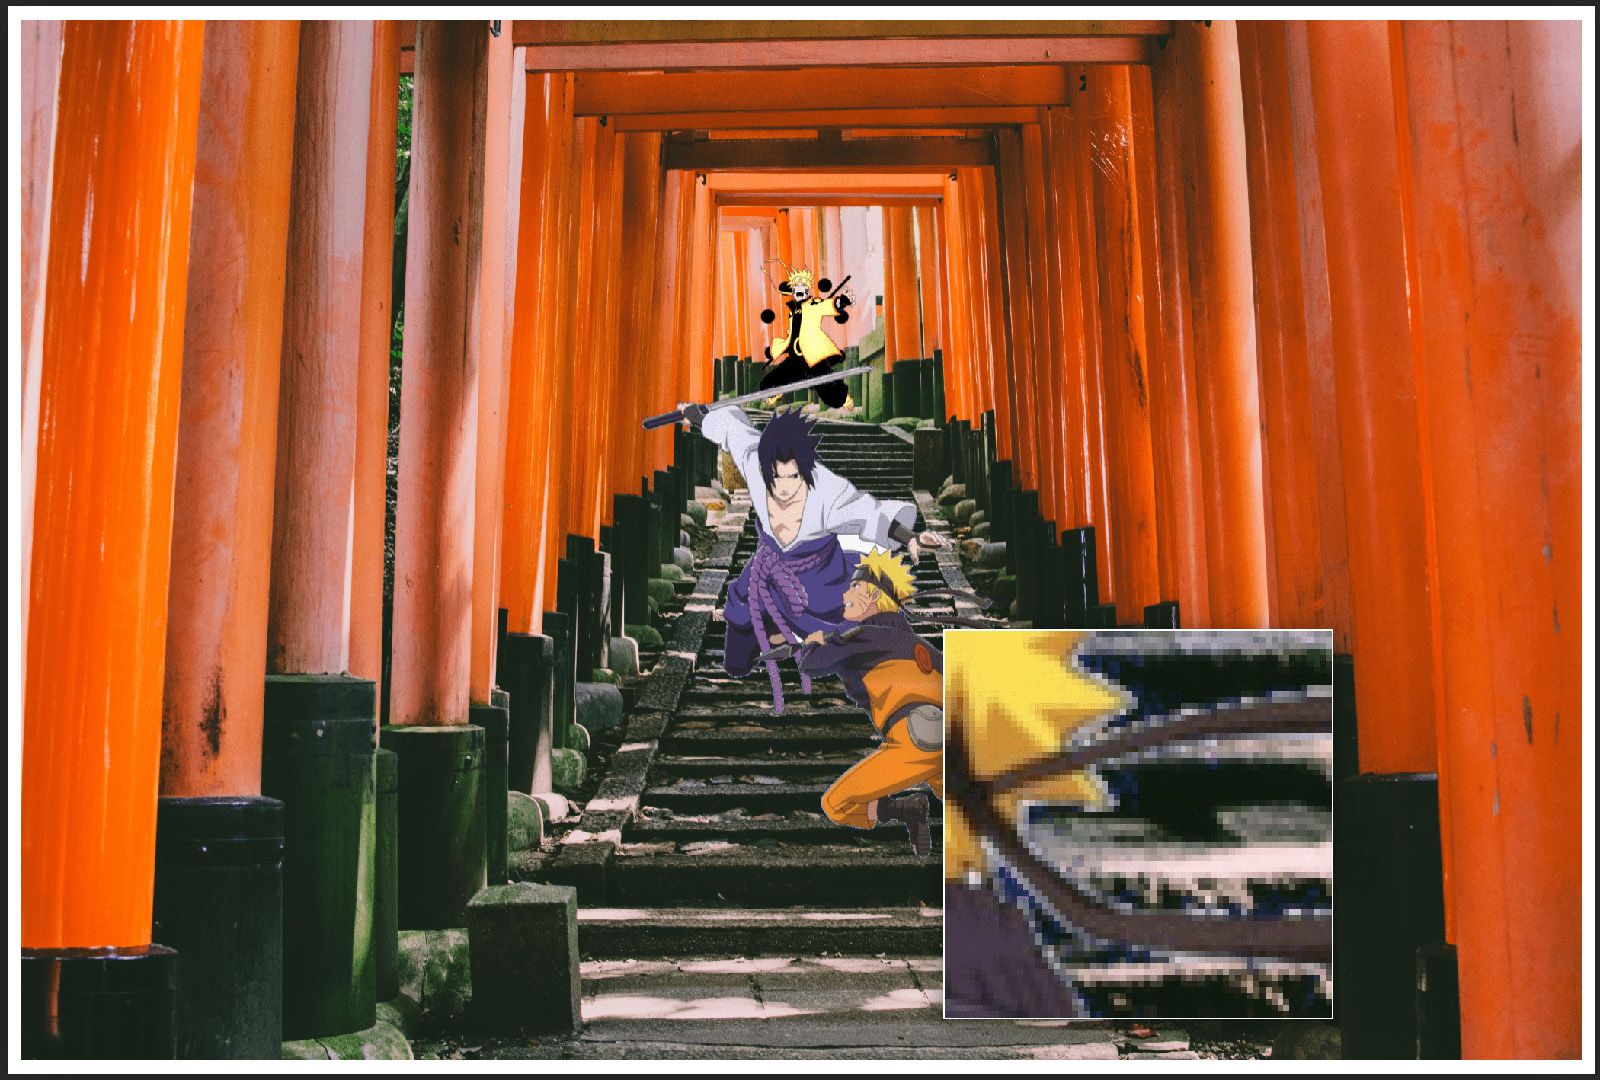
Magnifier#
The magnifier is straightforward to use: as you might suspect, the idea is just to zoom on suspicious parts to see if we can find anything that does not look natural. For example, if we zoom on the head of the bottom right character in the image we used in the previous part, we can observe some white pixels surrounding his hairs, headband, and clothes, which indicates that the image was likely pasted into the picture.
Thumbnail Analysis#
For JPEG images, the thumbnail image (if it exists) is stored in the EXIF data. Sometimes, it can occur that the thumbnail is not updated when the image is, therefore showing us the original version of the image
To Go Further#
Reverse Image Search#
Often, you may find an image that you want to know more about. For example where it comes from. To assist with that, there are a lot of online services that allow finding where an image (or similar images) is used. The following list is a sample of such services, but you could also find more specialized ones that allow doing facial recognition. Note that you want to be careful with what you send to these services (especially Russian and Chinese ones), as they will likely store what you are uploading.
You don’t necessarily need the original image to find what you are looking for. For example, if we used google to search for the image we used as an example in the previous part, we would find the original(link dead since: unsplash.com/photos/QjnobzYw7uU) background image on Unsplash, even if our input is a bit different.
Similarly, we could crop the characters from our image to try and find out more about them. In this case, we don’t find the original image (unsurprisingly since the background would make the image quite different) but Google still gives us some useful tips. In this case, we find other pictures of these personages, as demonstrated in the following screenshot (note that Google automatically added the “fictional character” part to the search).

Other General Tips#
So far, this article gave an overview of basic methods that can be used to learn more about an image such as the metadata, filters to find modifications, and ways to identify the source/place/persons present in an image. This part will list some final tips.
Note that even if you are analyzing a blurred picture, there are various software such as Smart Deblur that would allow you to improve the image quality (results are variable) to have a better input to work with.
To conclude this article, I would like the share a few extra tips of things you can look for when trying to find where a picture was taken.
- Look in the image to find any text, QR codes, … It could be the name of a shop, a company logo, … You could then search this element to try and find out its relation with your image (Google translate can be used in image capture mode to understand foreign languages). For example, if there is a restaurant in your image, you could try and find where this restaurant is by using the name displayed on its front sign
- In general, try to find things that stand out in your image. For example, if you have a view of Tokyo from atop, and you see the Tokyo Tower (without knowing that this is Tokyo/the Tokyo Tower), then you could search for “red white steel tower big city” in Google to learn more
- In addition to the previous tips, finding multiple distinguishable elements will help to better triangulate the position from when a picture was taken
- If you have a photo, and you managed to isolate an approximate location, you can use both Google’s satellite and street views to find the exact place from where the picture was taken (beware of the date on the bottom of the screen)
References#
- Photo Forensics Tutorial
- FotoForensics Tutorial (note that this software will store your image online)
Images Credits#
- Article Cover Image by Mick Haupt on Unsplash
- Photo by Jan Gottweiss on Unsplash
- Wallpaper Naruto Shippuden on Pinterest
- Naruto Vs Sasuke on SeekPNG